Thursday, April 27, 2023

Can't map Azure drive storage as netword drive

To map an Azure drive from a windows computer you must ensure that the value of registry key is 3:

HKEY_LOCAL_MACHINE\SYSTEM\CurrentControlSet\Control\Lsa\lmcompatibilitylevel

You can use this command to change the key from command line

reg add HKLM\SYSTEM\CurrentControlSet\Control\Lsa /v lmcompatibilitylevel /t REG_DWORD /d 0x3

Tuesday, March 1, 2022

Add-WindowsCapability failed. Error code = 0x800f0954 – RSAT Fix

This is a post by Paul at the sysadmin channel

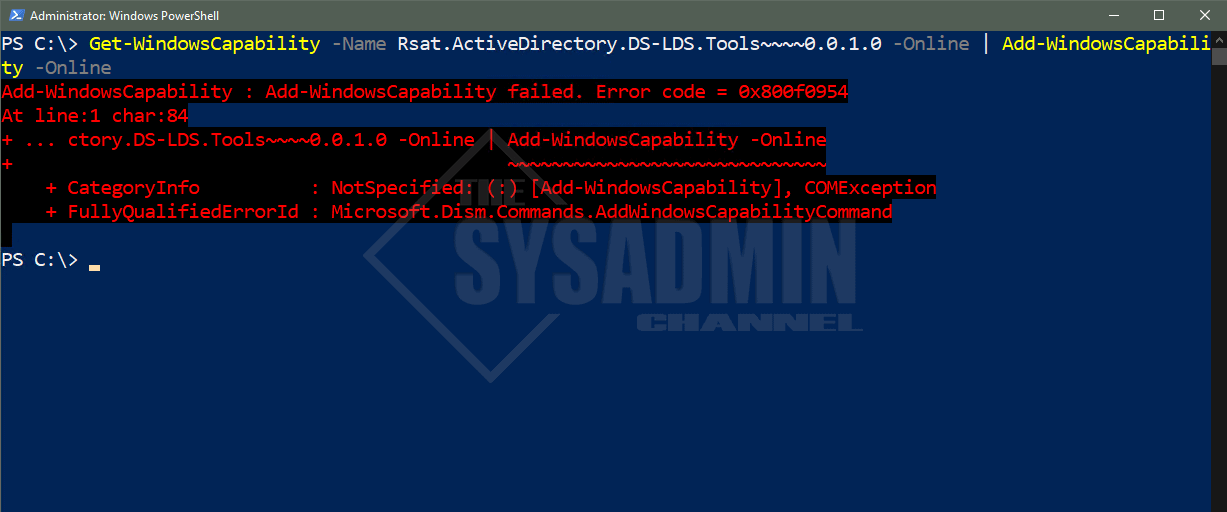
If you have tried to install Remote Server Administration tools for Windows 10 version 1809, 1903 or later you might have come across: Add-WindowsCapability failed. Error code = 0x800f0954. If you haven’t, that’s great! If you have, you’re in luck because today we’re going to go over the steps needed to fix the issue.

Add-WindowsCapability -Name RSAT Error

Wednesday, February 16, 2022

Wednesday, February 2, 2022

VMware ESXi Commandline Get CPU and Memory Information

This is a post by brandon.lee published at https://www.virtualizationhowto.com/2019/09/vmware-esxi-commandline-get-cpu-and-memory-information/ that explains several ways to get hardware info relative to your vmware esxi host

There are times with your virtual infrastructure running on top of VMware vSphere that you need to gather information about the physical servers you are running on. Have you ever wanted to know the details about CPU, memory, or other physical hardware? From time to time it is very handy to be able to gather some of these details from the VMware ESXi command line. Let’s take a look at VMware ESXi commandline get CPU and Memory Information.

Tuesday, July 27, 2021

Deleting a Specific Email from Entire Organization in Exchange 2010

This is an extract from a post at Microsoft Social Technet:

There are many scenarios where we need to get rid of some Emails from the whole server

1. Virus

2.Confidential Email sent wrongly – Got to remove it

3. Need to remove a Email with Specific subject from all the mailboxes

Exchange 2010 has Good features on Searching it and Remove it .

So Will Learn how to do that.

Wednesday, April 28, 2021

Friday, April 23, 2021

How can I see real time smtp logs on Exchange 2010

SMTP logging is diabled by default. You can read about it and how to enable it at these links.

Understanding Protocol Logging: http://technet.microsoft.com/en-us/library/aa997624.aspx

Configuring Protocol Logging: http://technet.microsoft.com/en-us/library/bb124531.aspx


Set-ReceiveConnector "My Receive Connector Name" -ProtocolLoggingLevel Verbose
Set-SendConnector "My Send Connector Name" -ProtocolLoggingLevel Verbose

And could see the logs on

C:\Program Files\Microsoft\Exchange Server\V14\TransportRoles\Logs\ProtocolLog

Tuesday, December 29, 2020

Removing the device partnership in Exchange 2010 using Powershell

Apparently Exchange 2010 SP1 brought a 10 mobile device per mailbox limit. This is a problem if you are letting a bunch of folks hook their iPhones into a common mailbox to share the calendar. The mailbox gets the message:

You have 10 phone partnerships out of the maximum allowed 10 partnerships. After you reach the maximum, you can't create additional partnerships until you delete existing ones from your account. To do so, sign in to Outlook Web App, click Options > Phone > Mobile Phones, and delete any unused partnerships.

Fortunately, the fix is pretty simple (excellent full write-up here), if you just want to increase the number of devices for your default policy.

  1. Start an Exchange powershell instance
  2. Run this to set max total devices (change 20 to whatever you want max to be)
    Get-ThrottlingPolicy | Set-ThrottlingPolicy –EASMaxDevices 20
  3. Then run this to set the maximum number of simultaneous devices (again, you can change the 20)
    Get-ThrottlingPolicy | Set-ThrottlingPolicy –EASMaxConcurrency 20

Alternativelly, you can remove all partnertships for a mailbox with the following command:

foreach ( $identity in Get-ActiveSyncDeviceStatistics -Mailbox username | Select-Object -Property "Identity" ) {
Remove-ActiveSyncDevice -Identity $identity.identity -Confirm:$true
}

Also you can remove all device partnerships where synchronization date (LastSuccessSync) is more than 30 days ago:

$DevicesToRemove = Get-ActiveSyncDevice -Result Unlimited | Get-ActiveSyncDeviceStatistics | Where {$_.LastSuccessSync -le (Get-Date).AddDays(“-30”)}

$DevicesToRemove | Remove-ActiveSyncDevice
Monday, November 23, 2020

Remove a disconnected Mailbox from Exchange 2010

This is a quick how to which will enable you to remove any disconnected mailboxes from exchange 2010, since the purge mailbox feature is no longer available. (Source: spiceworks).

Monday, November 9, 2020

Query Active Directory from Excel

This is and old post from Remko Weijnen with some comde to get information from Active Directory.

I had to lookup some users in Active Directory today which I received by mail. Offcourse I got full users name while I needed either samAccountName or full adsPath. Usually I write a small VBS script to do the lookup and paste this in Excel for further processing. But today I decided that an Excel function to do the lookup would be nice. So I wrote it.

The function is called GetAdsProp and allows you to search on a specific AD field in the whole AD tree and return the value of another field.

Friday, January 3, 2020

How to remove the recovery partition

These are the steps to remove the recovery partition in windows, thanks to https://superuser.com/questions/1073883/cant-remove-recovery-partition

  1. Go to start and type cmd (this is called command prompt)
  2. In command prompt type diskpart and hit enter
  3. Type list disk and hit enter
  4. From the list of disks find the one you want to work with (I believe in your case there is only one so it should be easy)
  5. Once you find the drive you are looking for type select disk 'numberofdrive'
  6. Now type list partition and find the partition you want to work with
  7. Once you have identified the partition in question type select partition 'numberofpartition'
  8. Now type delete partition (WARNING ONCE YOU DO THIS THERE IS NO GOING BACK) and hit enter , if it says "cannot delete a protected partition..." use delete partition override (Note you will also have to repeat these steps with the partition in front of the recovery partition if you plan on extending the system volume)
  9. Once it is finish type exit and hit enter

Tuesday, October 22, 2019

Remove vmkdump foder in VMware esxi 6.x

Run the command esxcli system coredump file list until get a true value for both parameters Active and Configured.

[root@esx:~] esxcli system coredump file list
Path                                                                                                     Active  Configured        Size
-------------------------------------------------------------------------------------------------------  ------  ----------  ----------
/vmfs/volumes/xxxxxxxx-xxxxxxxx-xxxx-xxxxxxxxxxxx/vmkdump/xxxxxxxx-xxxx-xxxx-xxxx-xxxxxxxxxxxx.dumpfile    true        true  3740270592

Then run the following two commands to remove de the dump file:

[root@esx:~] esxcli system coredump file set -u
[root@esx:~] esxcli system coredump file remove -f /vmfs/volumes/xxxxxxxx-xxxxxxxx-xxxx-xxxxxxxxxxxx/vmkdump/xxxxxxxx-xxxx-xxxx-xxxx-xxxxxxxxxxxx.dumpfile

Now you can remove the vmkdump folder.

Thursday, October 17, 2019

Set hardware time on VMware esxi 6.x from console

If you need to change the system time for a VMware esxi 6.x server fron CLI you must use the following command:

esxcli system time set


Friday, September 27, 2019

Update VMware ESXi v5.5

Since the updates for ESXi v5.5 are no more accesible at VMware Updates page, here you’ll find a procedure for install then from esxi console.

Thursday, August 8, 2019

Change the nic order on JovianDSS

In JovianDSS it is possible to change the NIC order to suite your needs.

Change vmnic order on vSphere 6.x

This is an article by Marco van Baggun at www.vmbaggum.nl that explains how to change vmnic order on vSphere 6.x

Here you can check how to do it for previous versions.

Monday, July 1, 2019

Enable traffic logs in Fortigate firewalls

Local traffic logs are disabled by default in fortigate firewalls. This logs can be enabled from console.

Check the following:
config  log  memory filter
get                               <<—lists all options


Make sure local-traffic logs are enabled. If not then:
set local-traffic enable
end

Enable "Log Allowed Traffic" and select "All Sessions" on the firewall policy.
Make sure you display logs from the correct location(GUI):
"Log & Report >> Log Settings >> GUI Preferences >> Memory/FortiCloud"